The blog has moved to http://www.betelge.com/blog.
Emulated 64-bit floats in OpenGL ES shader
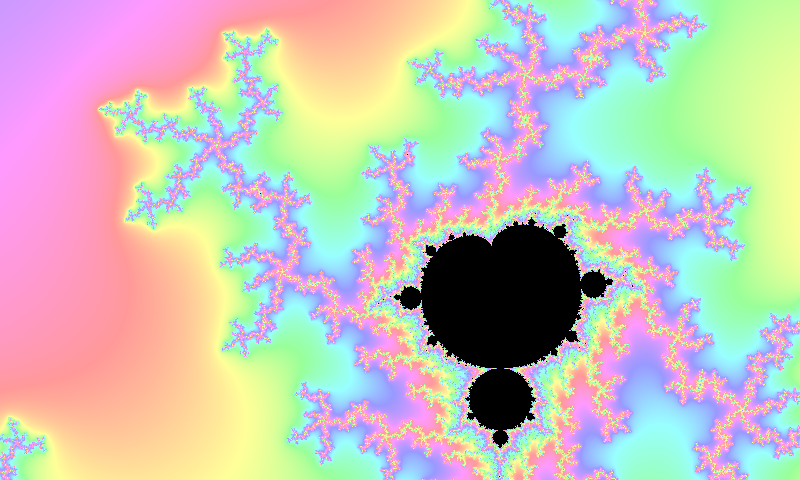
In the previous post the resolution of a Mandelbrot set fractal was greatly increased by generating it in a vertex shader instead of a fragment shader, because full highp 32 bit floats where available instead of the mediump 16-bit half-floats that many mobile devices limit their fragment shaders to. The mantissa precision increased from 10 bits to 23 bits.
At a scale of 10^(-4) the difference is obvious. Earlier I tried emulating a higher precision in the fragment shader inspired by this blog post, but it just wouldn’t work with the half-floats. It worked beautifully in the Android Emulator when I ran it on my desktop, but my desktop always uses full 32-bit floats even for the mediump fragment shader floats, which we can’t expect in a mobile device fragment shader.
Now when we are doing the calculation in the vertex shader instead we have full 32-bit floats on all mobile devices, just like the Android Emulator, so let’s try this again.
Representing a double with two floats
We’ll split the double up into a high and low part and put them in two floats
vec2 df;
df.x = high;
df.y = low
Since we’re using complex numbers that already are split up in real and imaginary components we’ll need four floats to represent a double complex number.
vec4 c;
c.xy = vec2(hihg_real, low_real);
c.zw = vec2(high_imag, low_imag);
We’re now using the full 128 bit vectors that GLSL supports to represent our complex values. We can use the primitive type vec4.
We need methods to split, add and multiply these emulated doubles. See them in this blog post. They will need to be rewritten and optimized for complex numbers. Since GLSL doesn’t have any operator overloading the code ends up looking a bit messy.
attribute vec3 position;
uniform vec4 offset; //vec4(hihg_x, low_x, high_y, low_y)
uniform vec4 scale;
...
vec2 real = add(mul(scale.xy,position.x, offset.xy);
vec2 imag = add(mul(scale.zw,position.y, offset.zw);
vec4 c = vec4(real, imag);
vec4 z = vec4(0.);
...
for(i = 0; z.x*z.x + z.z*z.z < ESCAPE_RADIUS; i++) {
    z = add(mul(z,z), c);
}
...
We can’t interpolate the split attributes, but it never happens because there is one vertex per fragment. In fact I should try turning the interpolation off if possible. In the for-loop condition we only use the high parts of the real and imaginary values of z.
The add() and mul() methods are hiding a big number of multiplications. This code is much slower then the previous shaders, but it does greatly increase the precision.
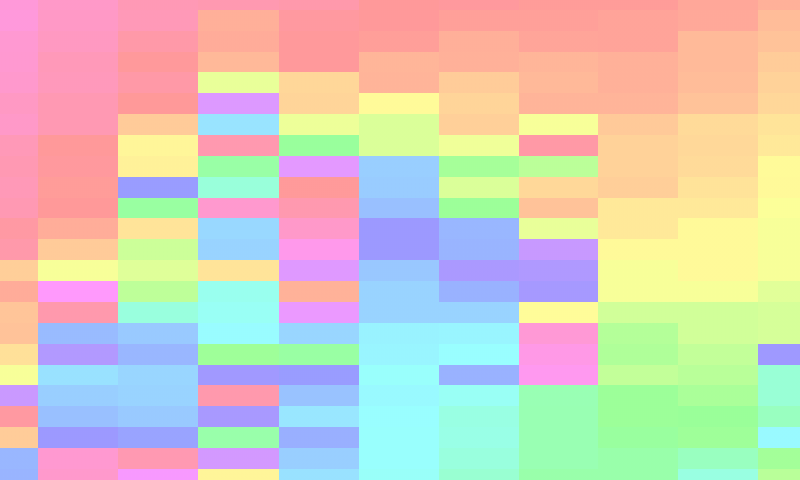
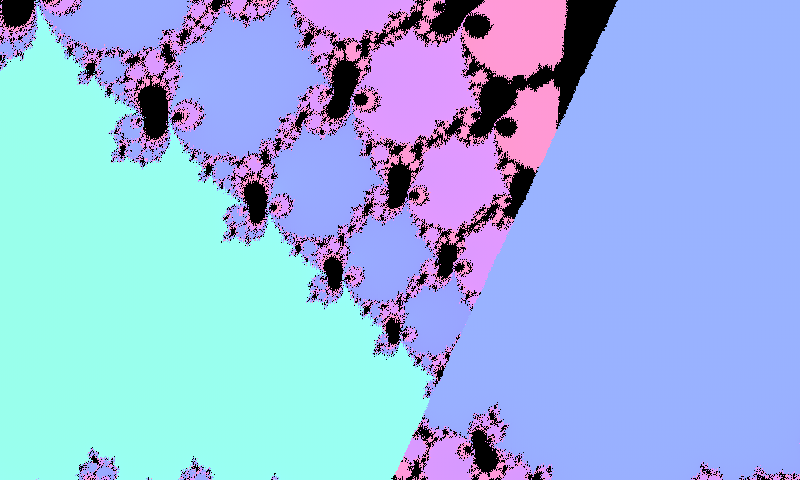
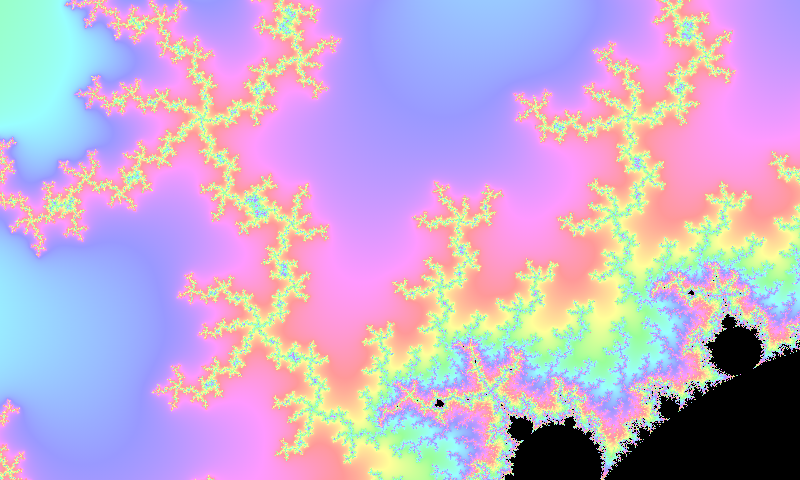
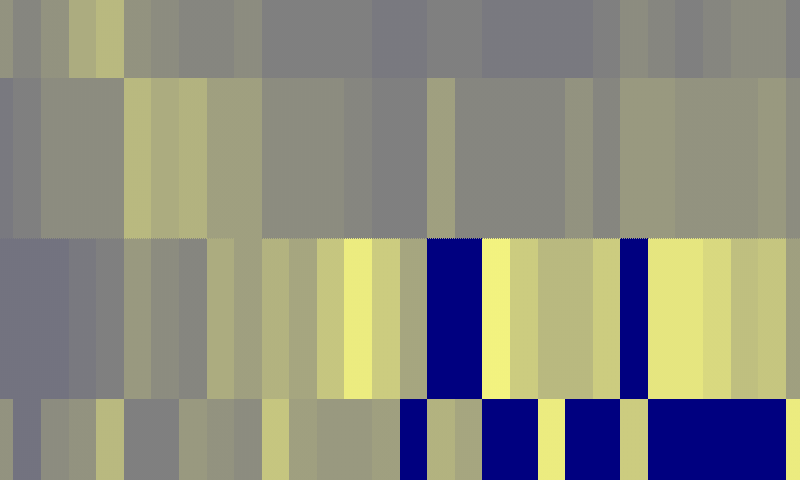
Zooming in until the vertex method looks blocky at the scale of 10^(-7) and switching to the emulated doubles method shows the huge improvement. What we’re looking at is a small corner of the black dot that can be seen in the lower art of the images at the top of this post. Now we can zoom in all the way to a scale of 10^(-14) before we start seeing blocks. Whatever stopped the emulation from working properly in the fragment shader isn’t a problem in the vertex shader. This is working great!
Results
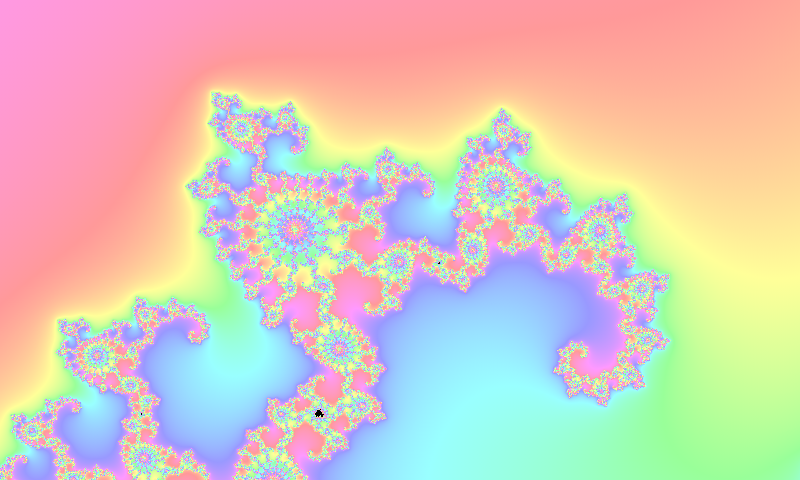
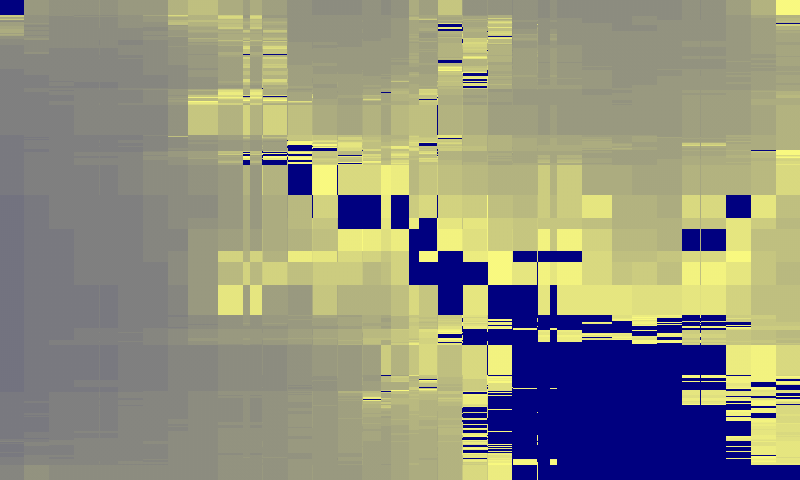
 This is a rendering at the scale of 10^(-13). Occasionally there are some linear discontinuities. I don’t know where these are coming from. Maybe from an incorrect splitting of some doubles. That’s something to look into later.
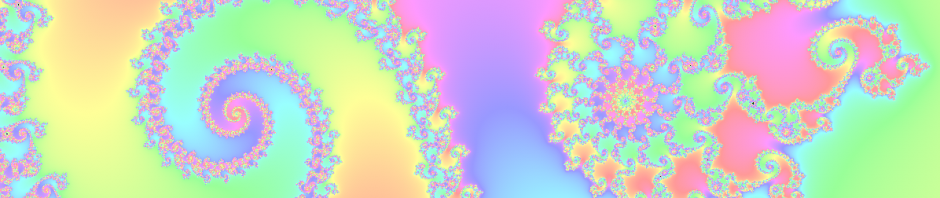
The shaders are working great in the app!
You can see the full source code on GitHub here. The shaders are in the res/raw folder.
Posted in Uncategorized
Leave a comment
High precision floats in OpenGL ES shaders
In the previous post I tried emulating higher precision by using two 10-bit precision floats, but couldn’t get it working.
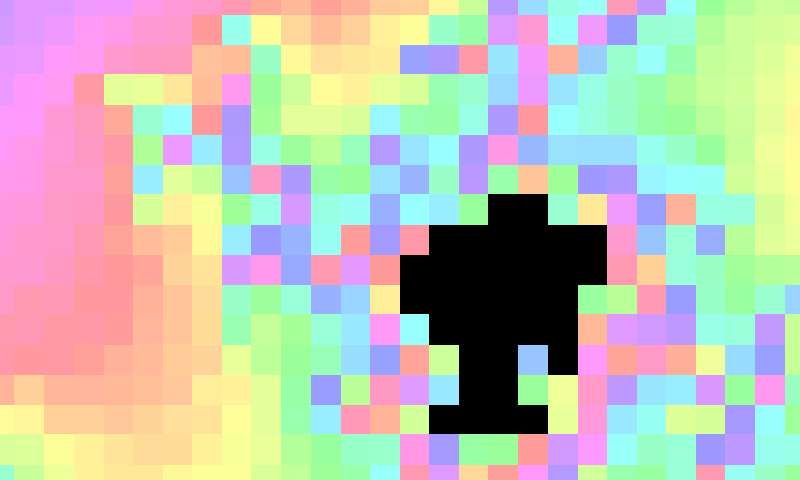
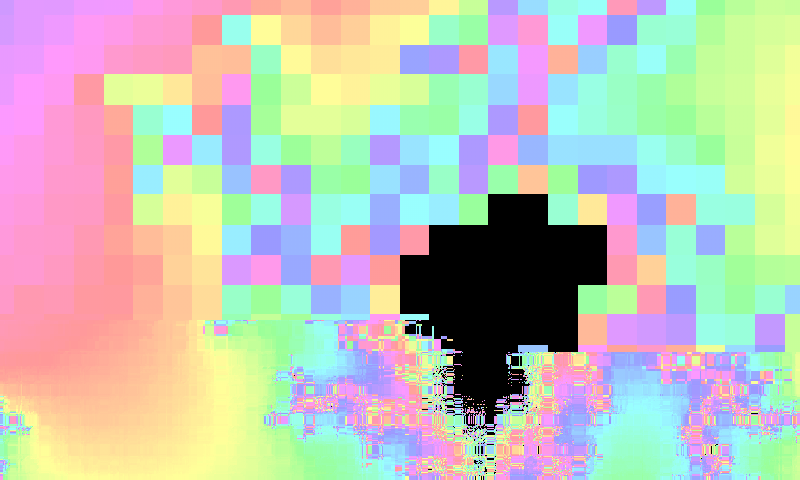
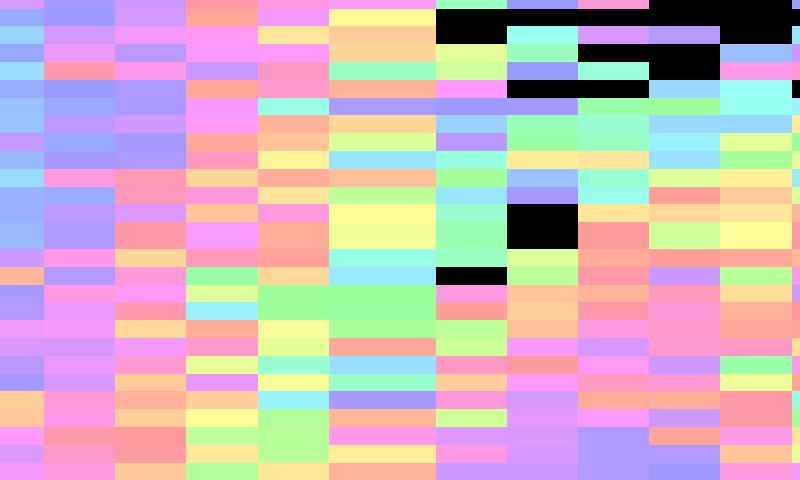
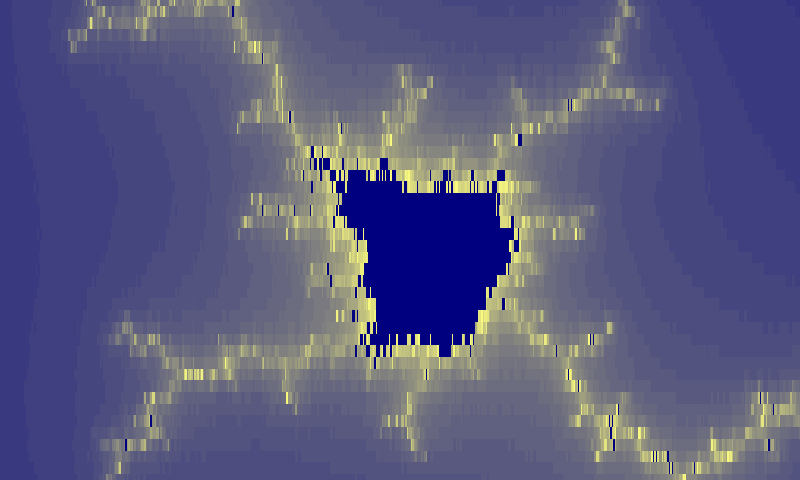
As you can see in the lower part of the screenshots, the precision did increase but not by much. The upper part of the image remains blocky since the shader runs out of memory on my device and only updates part of the image. That’s because I revved up the number of iterations to 1024, but the final app should have that ability so this is another problem that needs to be solved. I also changed the color of the generated image to make the difference more apparent.
Generating a geometry that has one vertex per pixel
Let’s do the calculations in the vertex shader instead of the fragment shader. OpenGL ES guarantees high precision floats in vertex shaders but not in fragment shaders, so generating the fractal there should greatly increase the resolution. Vertex shaders are executed once per polygon vertex and not per screen pixel, so we need to create a geometry that contains exactly one vertex per pixel of the screen and fill the screen with it.
public class Geometry {
    private ShortBuffer indices;
    private FloatBuffer buffer;
    ...
}

private Geometry generatePixelGeometry(int w, int h) {
    ShortBuffer indices = ShortBuffer.allocate(w*h);
    FloatBuffer buffer = FloatBuffer.allocate(3*w*h);

    for(int i = 0; i < h; i++) {
        for(int j = 0; j < w; j++) {
            buffer.put(-1 + (2*j + 1)/(float)w);
            buffer.put(-1 + (2*i + 1)/(float)h);
            buffer.put(0);

            indices.put((short)(i*w+j));
        }
    }
    buffer.flip();
    indices.flip();

    return new Geometry(indices, buffer);
}
This will generate a geometry that contains one vertex in the middle of every pixel on a screen of resolution w x h. OpenGL ES 2 uses short indexing and doesn’t support int indexing for vertices. That’s why we use a ShortBuffer for the indices buffer. This also means that we have to split up our Geometry into smaller pieces. The max value for a short is 32767. The best option is to generate one single geometry that has fewer vertices than that and reuse it several times across the screen using multiple draw calls. Either way we have to make sure that the final scene has one vertex in every pixel of the screen.
The vertex shader
attribute vec3 position;

uniform mat4 modelViewMatrix;
uniform float MAX_ITER;
uniform vec2 scale;
uniform vec2 offset;

varying vec4 rgba;

vec4 color(float value, float radius, float max);

vec2 iter(vec2 z, vec2 c)
{
        // Complex number equivalent of z*z + c
	return vec2(z.x*z.x - z.y*z.y, 2.0*z.x*z.y) + c;
}

void main(void)
{
	vec4 posit = modelViewMatrix * vec4(position, 1.);

	vec2 c = 2.*(scale*posit.xy + offset);

	vec2 z = vec2(0.);

	int i;
	int max = int(MAX_ITER);
	float radius = 0.;
	for( i=0; i<max; i++ ) { 	radius = z.x*z.x + z.y*z.y; 		if( radius > 16.) break;
		z = iter(z,c);
	}

	float value = (i == max ? 0.0 : float(i));

	rgba = color(value, radius, MAX_ITER);

	gl_Position = posit;
}
The vertex shader has to take the modelViewMatrix into account since we are splitting the geometry into multiple pieces and placing it at different positions in a scene. This had to be done because a single big geometry would be too big for short.
The fragment shader
precision mediump float;

varying vec4 rgba;

void main()
{
	gl_FragColor = rgba;
}
The fragment shader is as simple as it can be. It just receives the rgba vector from the vertex shader and draws it to the frame buffer.
Results
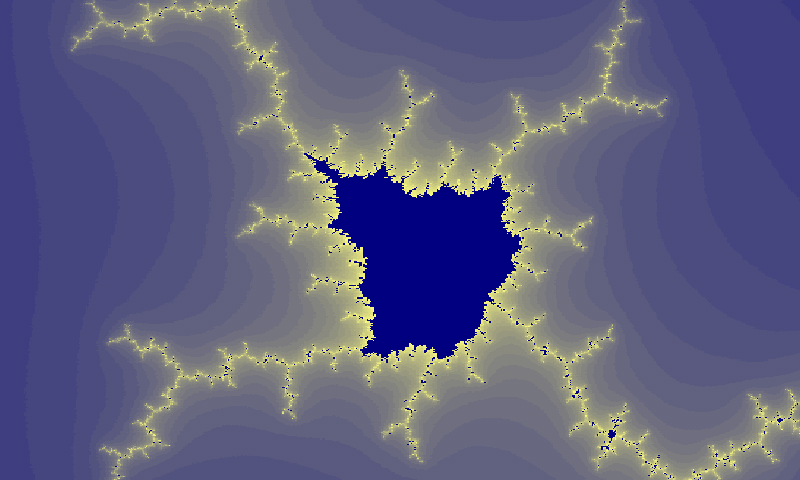
That’s much better!
The fractal renders slightly slower than with the lower precision shader but still really quickly and does 1024 iterations without running out of memory . Let’s see how much we can zoom in now.

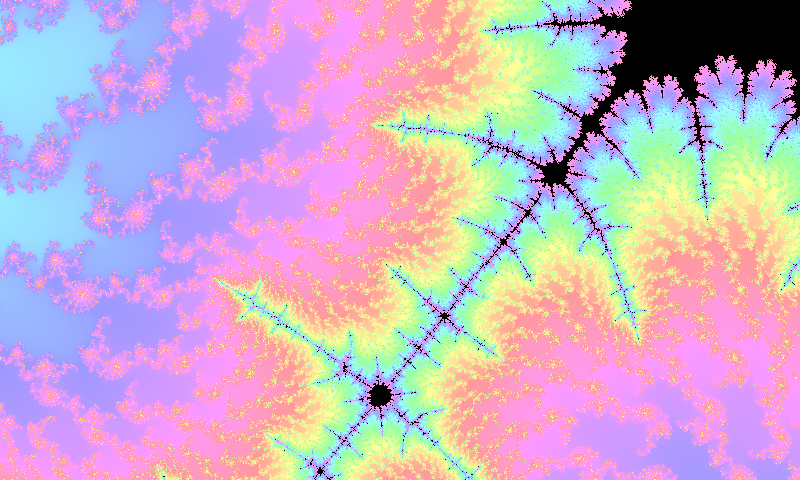
The pixels start filling out the screen at a scale of 0.0002, a zoom level of 5000x. Switching to the vertex mode instead shows an amazing difference. On my device highp floats in the vertex shader are normal 32-bit floats and have a precision of 23 bits, while the mediump 16-bit floats in the fragment shader only have a 10-bit precision. That means that the precision is more then doubled. Every pixel in fragment mode becomes in vertex mode bigger than the entire shader was in fragment mode. In fact pixels became apparent first on a scale of 2*10^(-6). See the results for your self in the google play: GPU Mandelbrot.
In the next post I’ll give double emulation one more try.
Posted in Uncategorized
1 Comment
Emulated double precision in OpenGL ES shader
In the previous post, Generating the Mandelbrot set in an OpenGL ES shader, there was blockiness caused by the low precision of the fragment shader at a zoom level of just 100x. We would like to be able to scale the fractal by factors of millions to explore it properly so this is totally inadequate.
I found a blog post about emulating double precision in GLSL by using two floats to represent a value. I recommend reading it as the author gets some pretty nice results. I tried porting the code and making it work in OpenGL ES, but the my results where far from excellent.
You can see that there is an actual improvement. The emulation works!
But at a closer look the improvement is minimal.
I modified the code to account for the lower float precision but it didn’t help. In the Android Emulator it worked much better, but the emulator has a much higher float precision even with single midiump floats.
This is where I realised that even though OpenGL ES doesn’t guarantee high precision floats in the fragment shader, it does in the vertex shader!
The next post in the series shows how to use the precision of the vertex shader to greatly improve the details.
Posted in Uncategorized
4 Comments
Generating the Mandelbrot set in an OpenGL ES shader
Fractals are easy to parallelize and GPUs are insanely fast at parallell tasks. Mobile devices are not intended to be used this way so we can forget about OpenCL and other GPGPU techniques and we can expect to find obscure vendor specific limitations and bugs. The final app can be found in Google Play, GPU Mandelbrot.
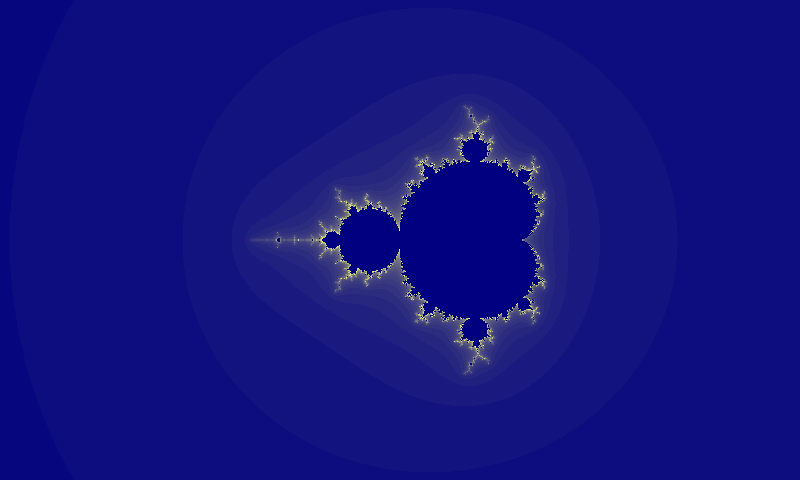
My long term goal is to generate entire interactive worlds on the GPU, but we have to start with something simpler. The Mandelbrot set is defined to be the set of complex numbers c, for which the formula z = z^2 + c will go towards zero when run over and over again.
All the work here will be done by the fragment shader. The rest of the app will be as simple as possible. We draw a screen filling quad and color it with our shader. How to set this up in a minimal way will be covered in a future post.
The Vertex Shader
uniform vec2 offset;
uniform vec2 scale;
attribute vec3 position;
varying vec2 c;

void main() {
    c = scale*position.xy + offset;
    gl_Position = vec4(position, 1.);
}
Very simple. The fractal coordinates are passed on to the fragment shader as the variable c and the vertex position is just converted to the 4-component representation that OpenGL requiers. No need for any matrices or other transforms. The offset and scale uniforms will allow us to pan and zoom the fractal. That’s all for the vertex shader.
The Fragment Shader
Here we immediately get reminded that we’re coding for a mobile device and not a desktop with a full fledged discreet GPU. The shader won’t compile unless it starts with the following line:
precision mediump float;
That is a precision qualifier. OpenGL ES 2 doesn’t guarantee support for full single float precision in fragment shaders. No big deal. We set the precision of floats to mediump and forget about it. On most devices mediump means 16-bit. One of those bits is used for the sign and another 5 for the exponent, which leaves 10 bits of precision for the mentissa, the actual decimals of the float. A float usually has the form (-1)^sign*1.mentissa*2^exponent.
Querying OpenGL with the following code
int range[2], precision;
GLES20.glGetShaderPrecisionFormat(GL_FRAGMENT_SHADER, GL_MEDIUM_FLOAT, range, &precision);
tells me that my device has a mediump float precision of 10.
The full fragment shader:
precision mediump float;

// The fractal coordinate in the complex plane
// Passed down from the vertex shader
varying vec2 c;

// The function that defines the Mandelbrot set
float iteration(float z) {
    return z*z + c;
}

void main() {
    float z = 0.; // The decimal point makes the zero a float
    int i;
    int MAX_ITER = 40; // How many iterations to do
    float ESCAPE_RADIUS = 16;
    for(i = 0; i < MAX_ITER; i++) {
        // If z gets outside of the escape radius
        // we know it's not part of the set
        if(z > ESCAPE_RADIUS) break;

        // Do the math
        z = iteration(z);
    }

    // If we do all the iterations and still remain inside
    // the escape radius, we say that the point belongs
    // to the set and color it 0.
    //
    // If the point escapes we color it with a gradient
    // depending on how many iterations it took it to
    // escape.
    float speed;
    if(i == MAX_ITER)
        speed = 0.;
    else
        speed = float(i)/float(MAX_ITER);

    // speed 0 -> blue
    // slower speed -> more yellow
    gl_FragColor = vec4(speed, speed, 0.5, 1.);
}
That’s all we need in the shader for a zoomable fractal viewer.
Some devices might fail to compile this fragment shader because of the dynamic for loop in it. They need to be able to unwrap loops and we have to use constants for the start and end points of the loop. How to get around this is left for a future post, but for now a workaround is to write the for loop like this:
int i;
float ESCAPE_RADIUS = 16;
for(int j = 0; j < 40; j++) {
    if(z > ESCAPE_RADIUS) break;
    z = iteration(z);
    i++;
}
It doesn’t look like a big difference but it will be as the shader gets more complicated in future posts.
Precision
Let’s see how far we can zoom!
That’s at 100x zoom level, a scale of just 0.01. Not even remotely as good as I had hoped! The floats in our fragment shader just don’t have enough precision. That mediump at the start of the shader turns out to be a problem.
The next post in the series will be about emulating double precision in OpenGL ES shaders.
Posted in Uncategorized
1 Comment
